After you executed an SQL query, all datasets (or result sets) that server returned will be shown in tabular view at the bottom of the SQL tab. The data workflow will be the same regardless of the DBMS used.
Column Ordering
Click on a column to sort it by ascending, second click will sort it by descending. Press and hold Ctrl key to sort by multiple columns. In the example, the table was ordered by “email” column at first (ASC), then by “last_update” (DESC), and then by “active” column (ASC):
Search Data
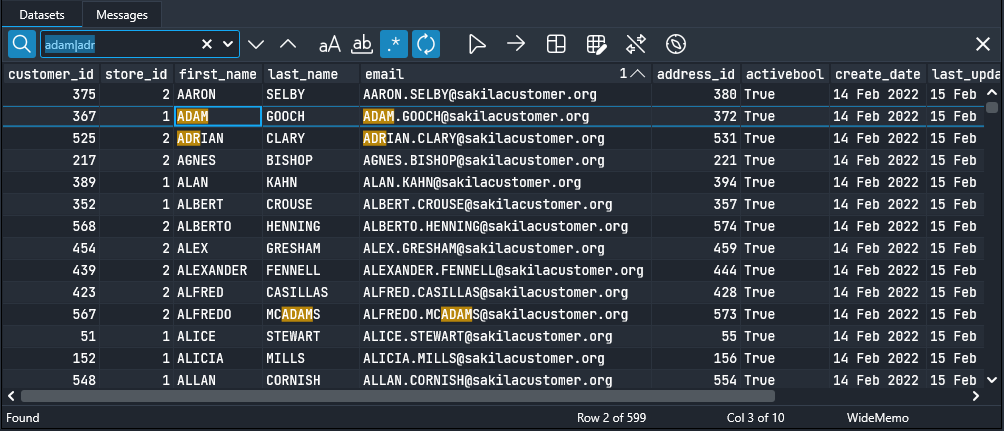
Click magnifier icon to expand Search tool bar. Type your search phrase, turn on any options, if needed: case sensitive, whole words, regular expression, wrap around. In the following example, we use regex to find “adam” or “adr” string:
Click the Filter tool button to show only the records that meet the search criteria.
Select and Copy Data
Click second tool button to expand Selection tool bar and to turn Selection mode on. In this mode:
Column header click will select the whole column, rather than order it. If Ctrl is pressed, a new header click adds the column to selection.
If Ctrl is pressed, click on a grid’s cell selects whole row, rather than a particular cell.
Use context-menu commands to copy selected data. It can be pasted into a spreadsheet. Turn Headers and Row# on to add column headers and row numbers to copied data:
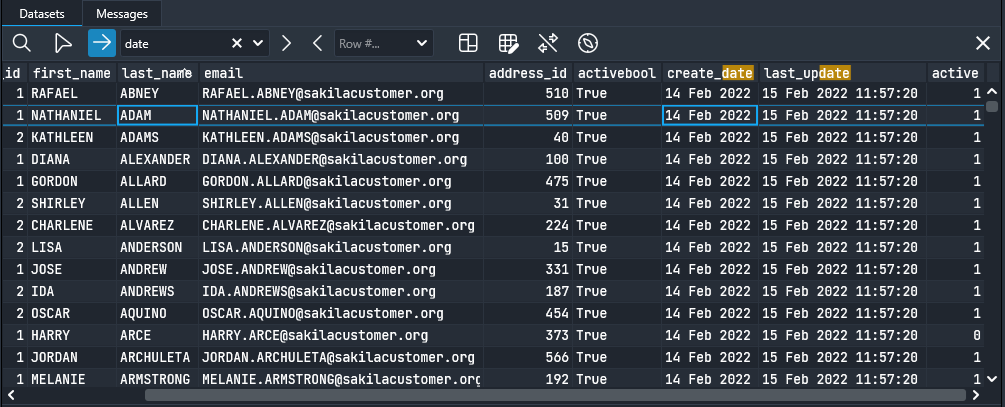
Search by Column Names
Use “Go To” panel to fast search a column by part of its name. To quick jump to particular row in the grid, type the number in “Row #” text field and press Enter:
Grid View
Grid View tool bar panel allows to switch between various data representation.
Tabular (default) – usual grid that you can see on all screenshots above.
Flow cells view – useful when the dataset contains a lot of columns, and you need to see all of them at once. Shows a single record, use Navigator to move by rows:
Record view – makes columns as rows and shows only current record. As in Flow Cells view, move by records with Navigator. Allows to see more column values at once compared to regular Tabular view:
Edit Data
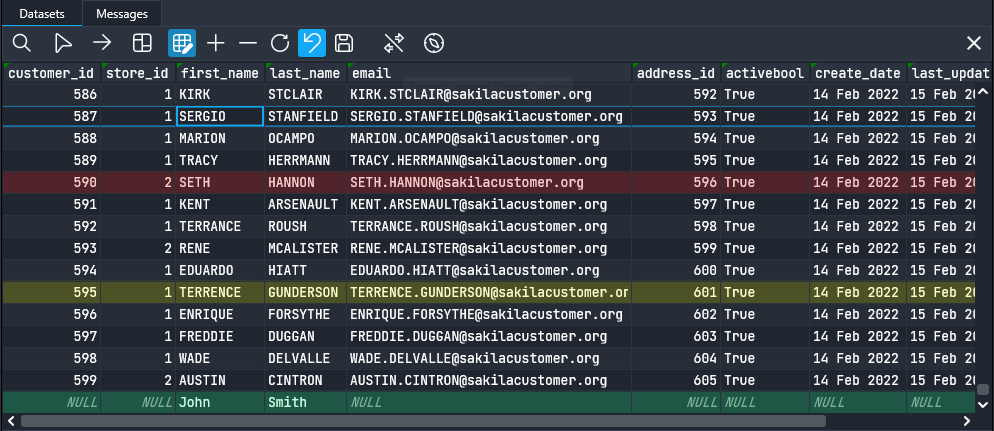
The panel contains data editing actions:
Add new row (to the end of the table, highlighted with green)
Delete rows (current one or multiple selected, highlighted with red)
Refresh – re-fetches data from the server
Undo last change
Save changes to the database table.
Edited rows are highlighted with yellow:
Please note:
Fields of JOINed tables cannot be modified.
Saving changes to tables that participate in cross-DBMS queries is not supported.
Export and Import Data
SQL Commander provides opportunities to export data to JSON, XML, TXT, and BIN files. The same for import, except for TXT – currently it is not supported. The toolbar contains following options that will be used on export to text files:
Headers – check to add column names to exported data.
Row # – adds row numbers.
Delimiter to be used in the text file.
For JSON and XML there is a single Format option. Check it if you want the data to be human-readable (“pretty-print”).
The process is straightforward – click Export button, choose the file name and type. The dataset will be saved to the file specified. Do the same actions in reverse order to Import file to the dataset.
Navigator
Use it to move by current dataset. Useful in Record View and in Flow Cells View modes. Contains 4 tool buttons: First, Previous, Next, Last.
Context Menu Actions
Every dataset in the app has following right-click menu items:
Copy current cell value or block selection.
Copy Rows – copies selected rows only.
Copy Columns – copies selected columns only.
Select All – selects the whole grid.
Reset Selection
Find – expands Search tool bar.
Fit Column Widths – adjusts fields width based upon visible rows values.
Query This Dataset – opens new SQL tab that provides you possibility to query the dataset locally.